Writeup
About
This is a technical blog detailing the work our web development team has put in to creating this website. It will follow the journey from the initial idea to the final product, including the challenges we faced along the way. You don't need much technical knowledge to understand this blog, but it will help.
Team
The person managing the web dev team is Chua Zhong Ding. I'm also the one writing this blog. The main contributors so far are: Liou Larissa - Handled Fullstack work for the website Ravin Nagpal - Worked on the Frontend for the Gallery Page Ultraduck - Worked on the Frontend for the Achievements Page Anyi - Worked on Frontend for the Home Page
The rest of the work was handled by me. I was also responsible for the checking of each page after each member was done
Our team was split into a design, frontend and backend team. The design team was responsible for creating the mockups and wireframes for the website. The frontend team was responsible for implementing the designs and the backend team was responsible for the server side of things.
Purpose of Website
The purpose of this website was to introduce Singapore Students Mergers to the general public in a more professional manner. It serves as a platform for us to showcase our achievements, as well as share our website and knowledge with the world.
Planning
Firstly, we had to decide on the features we wanted on the website. As all of us were student coders, we wanted to showcase our talents by creating a useful, professional website, one to stand out from the other CTF (especially singapore based) teams. We had two plans:
Plan 1
This plan was to create a website that wholely used Static Site Generation (SSG).
How this would work is that members would create pull requests to the website's repository, and the website would be rebuilt and redeployed each time a pull request was merged. This is a simple approach to sharing our writeups and blogs with others.
Pros
- All members should have access to the Repos, thus they should be able to create their own MD file and upload it into the github repo directly
- This simplifies the process, we don't have to worry about dealing with databases or login systems
- We can use a Static Site Generator to boost the load times and remove a server completely.
Cons
- It will take sometime to redeploy the website, though this shouldnt take too long (arnd 1~2min)
- With this approach, we won't be able to implement any backend related features (Backend people won't have to do anything)
- We won't be able to have a commenting system. The website will be completely static.
Plan 2
This plan was to create a website that relied on Server Side Rendering to update newly uploaded writeups and blogs.
This would be a more sophisticated approached compared to the first plan. It would require a whole authentication system, as well as a database and more.
Pros
- Completely automated, admin's won't have to do much (no need to approve pull requests)
- Good Learning experience for those who want to experience developing a user authentication system and upload system
- Comment system will allow members to extend upon the contents on a writeup, and like system could serve as a boost to morale
- We might be able to use the website for member specific events or activities in the future
- Helps differentiate our website from other writeup websites
Cons
- Adds complexity to the website. This could introduce several bugs in the setup process
- Comment system could go unused since writeups usually don't have that feature
- Developers may not have the relevant technical knowledge to implement it within the provided time period
Ultimately, we decided to go with Plan 2. We wanted this to be a learning experience and a challenge for all of us, and personally, I believed that we were capable of implementing it. Would the first plan be more practically in a real scenario? Yes. But I believe that the second plan would be more beneficial for us in the long run, and would allow us to expand the website to include more feature should we choose to do so in the future
We also created a timeline, ~~which was not followed~~, to sort of keep track of our progress.
Tech Stack & Infrastructure
The tech stack we decided to use was:
- Next.js (& React) - For the frontend
- Tailwind CSS - For styling
- NextAuth.js - For authentication
- Prisma - To interact with the database
- MySQL (MariaDB) - The database
We decided to use most of these techonlogies as they are popular and relevant frameworks as of writing. Thus those of us who were not familiar with it would be able to learn it and apply it to future projects.
MySQL was chosen as the database primarily because it was the database which our web hoster provided.
As for the infrastructure, I used x10premium to host the website. As I have used their services before, I felt their services were cheap, reliable, and their customer service was great, which would be useful to resolve any crashes that could occur in the website.
Design
First, the design team discussed the color scheme. There were several proposed. We use the website Real Time Colors to visualise each palette, listed below:
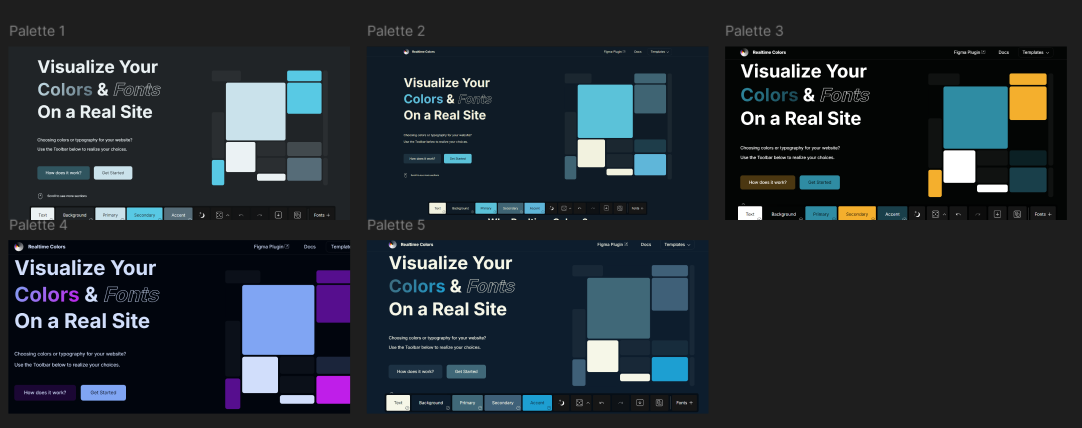
Ultimately, we conducted a vote and decided on the second color palette.
Next, the design team created the wireframes and design for the website. This phase took quite some time, as we were still students and had to balance our schoolwork with this project, especially with exams coming up. Taking about 2 months, design concluded in around early December. We used Figma to create the wireframes and designs. This blog will showcase each page in detail later.
Development
After design, development began. As A Levels had just ended, we were much more free compared to before. This phase only took 1 month. During the design phase, we started to learn and familiarize ourselves with the tech stack we were going to use, which is one of the reasons why development was so fast compared to design.
The development was split into 2 parts, frontend and backend. We wanted to make sure both teams could work concurrently, so we tried to isolate the frontend and backend as much as possible, giving placeholder data for the frontend to work with, while the backend team worked on the other parts of the website.
Most of the code I read through was decent, just needing a few touch ups. Some mistakes were made in the backend, such as lack of type validation, but those were quickly fixed. Generally a good job was done by the team.
Deployment
Deploying was a little difficult since we weren't using standard hosters like vercel. Our web service provider used cpanel, which did have some guides online on how to deploy a Next.js website. https://www.namecheap.com/support/knowledgebase/article.aspx/10686/29/how-to-deploy-reactjs-vitejs-react-native-and-nextjs-applications-in-cpanel/
I followed the guides but encountered some issues, which I resolved by just messing around with the code and some settings a little. Deployment took around 2 days, which was quite fast considering this is the first time I've setup a Nodejs application on cpanel, and the first time I've deployed a Next.js website.
Testing
Then began the testing. This phase was quite simple, members were given access to the website to see if there were any problems using the website. A few notable ones were:
- One of our members' had a incorrect profile picture
- On mobile the achievements page button did not redirect to the acheivements page
- Website thumbnail did not display on social media sites
A few more misc bugs were found, but they were quickly fixed.
The Pages
This section will detail each page of the website
Home Page
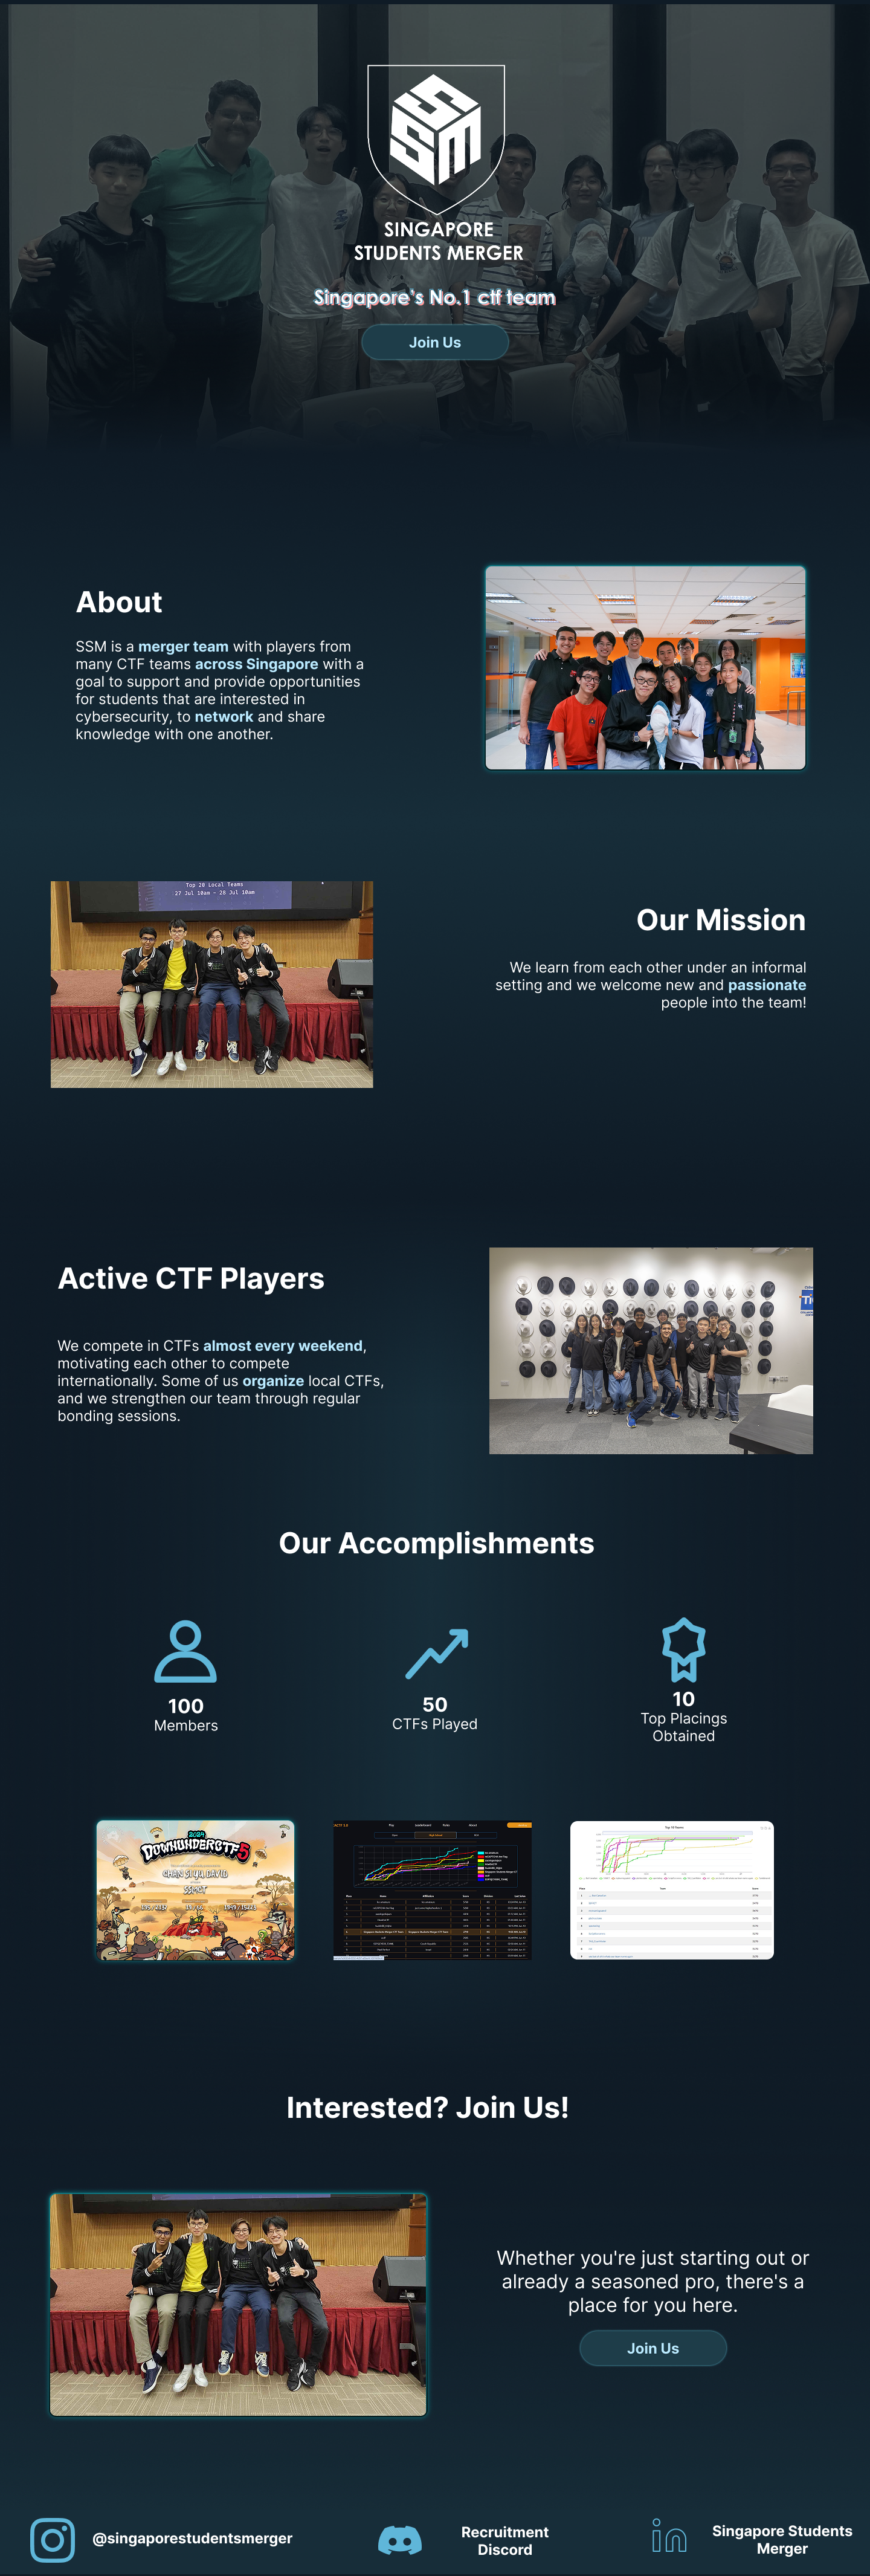
This is the landing page of the website. We decided to keep it simple and readable, with images and small chunks of text introducing us.
You can also notice a small gradient background design in the page. This will be a common theme throughout the website.
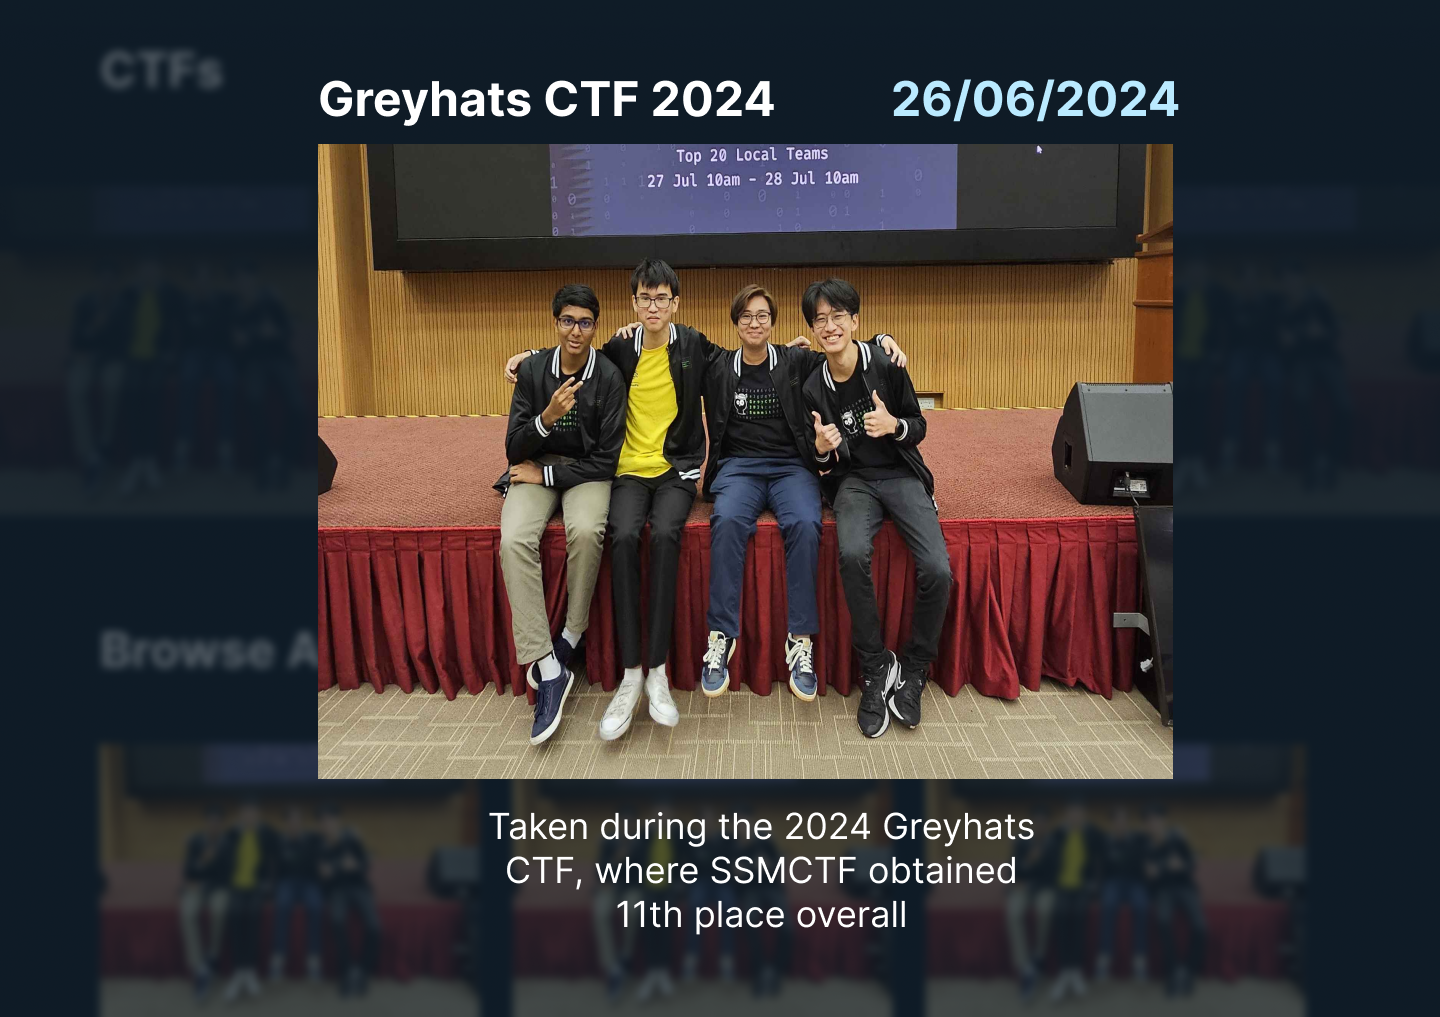
In addition, the Hero Section (The top most part of the page) includes an image of the team, simply to make the website more personal.
Members Page
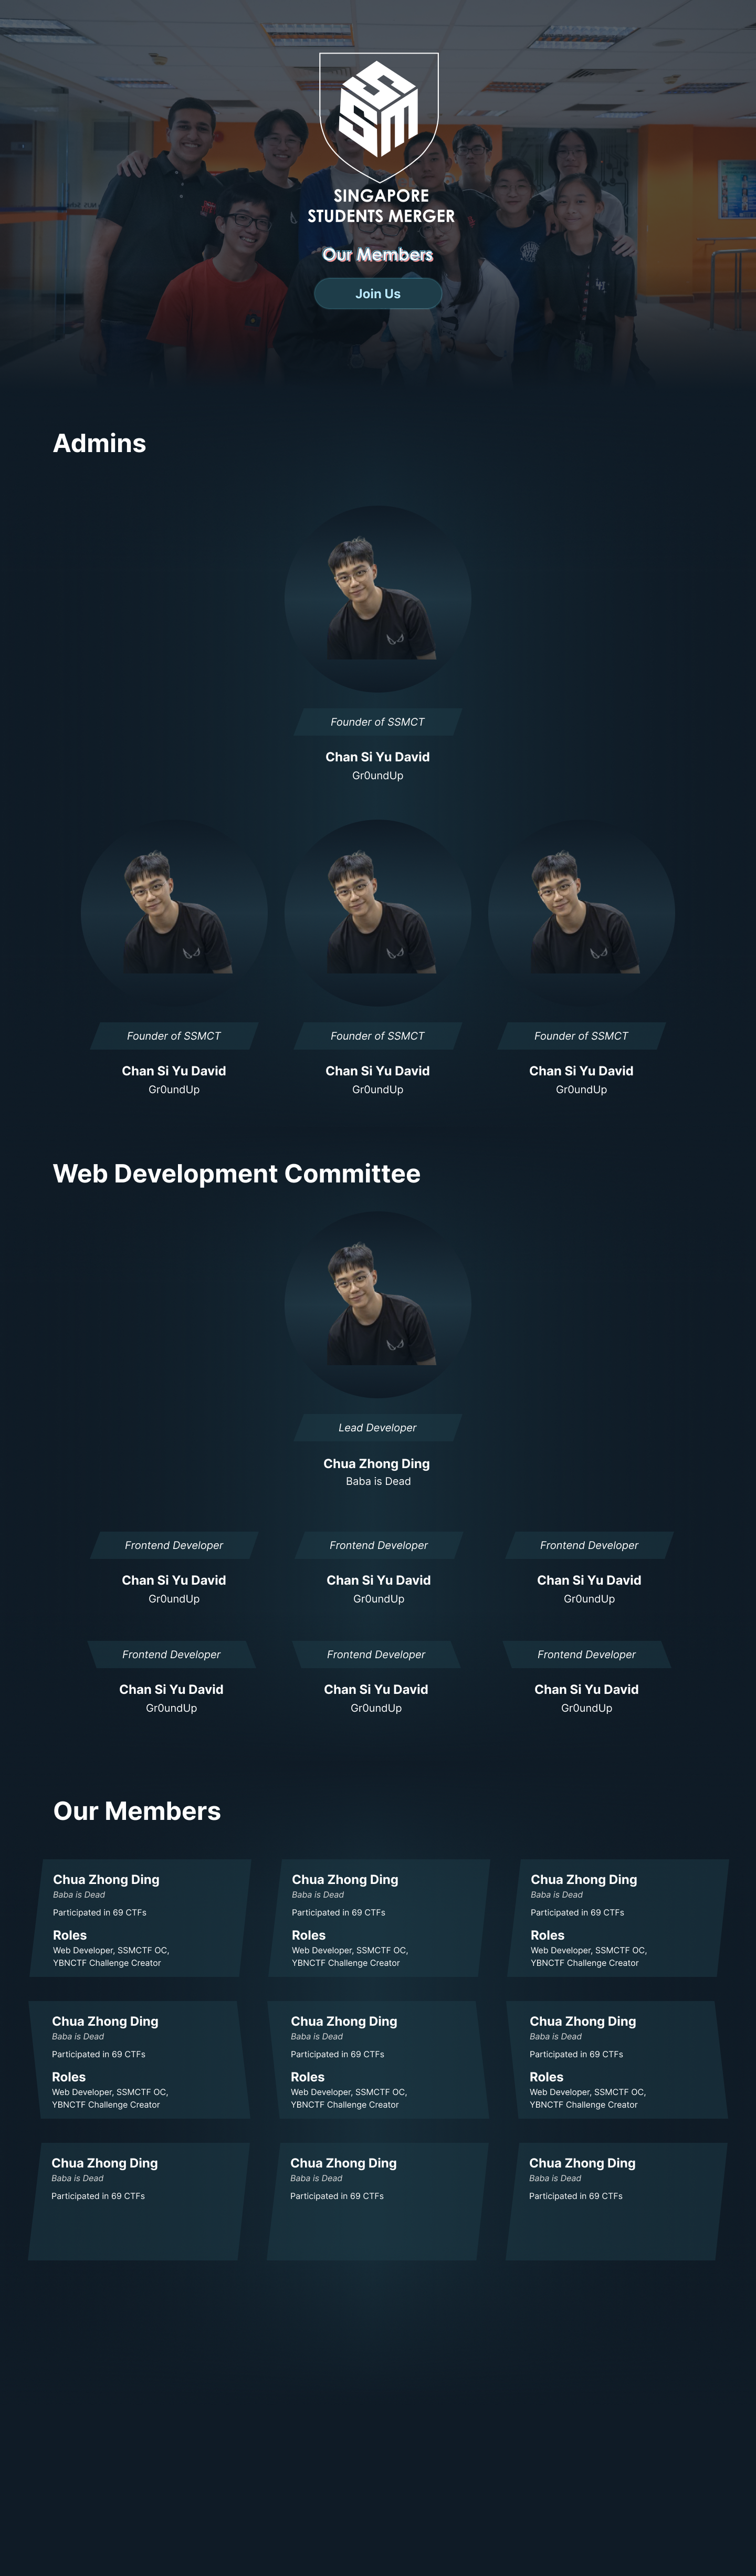
This is the members page. The Admin and Web Dev section for the members were hardcoded, but the additional section at the bottom to list all the members was dynamically generated based on how many of our members logged in to the website. It also lists the number of ctfs each member has participated in, and their major roles
To calculate the number of ctfs each member was in, I used a discord bot to fetch every single role, which would then update the database, and count the number of ctf related roles each member had.
The roles was a similar process, there are special fields for me to individually indicate which discord roles were major roles to be displayed.
Achievements Page

This is the achievements page. It showcases each ctf we particpated in, our placing, and the points we accumulated from it.
The backend for this was pretty difficult to implement. I had to make the website call the ctftime api, which contained all the data on each ctf. Then, I had to use the data from the discord roles to see which member participated in which ctfs.
The frontend was pretty simple, just a simple card design to display the data.
Gallery Page
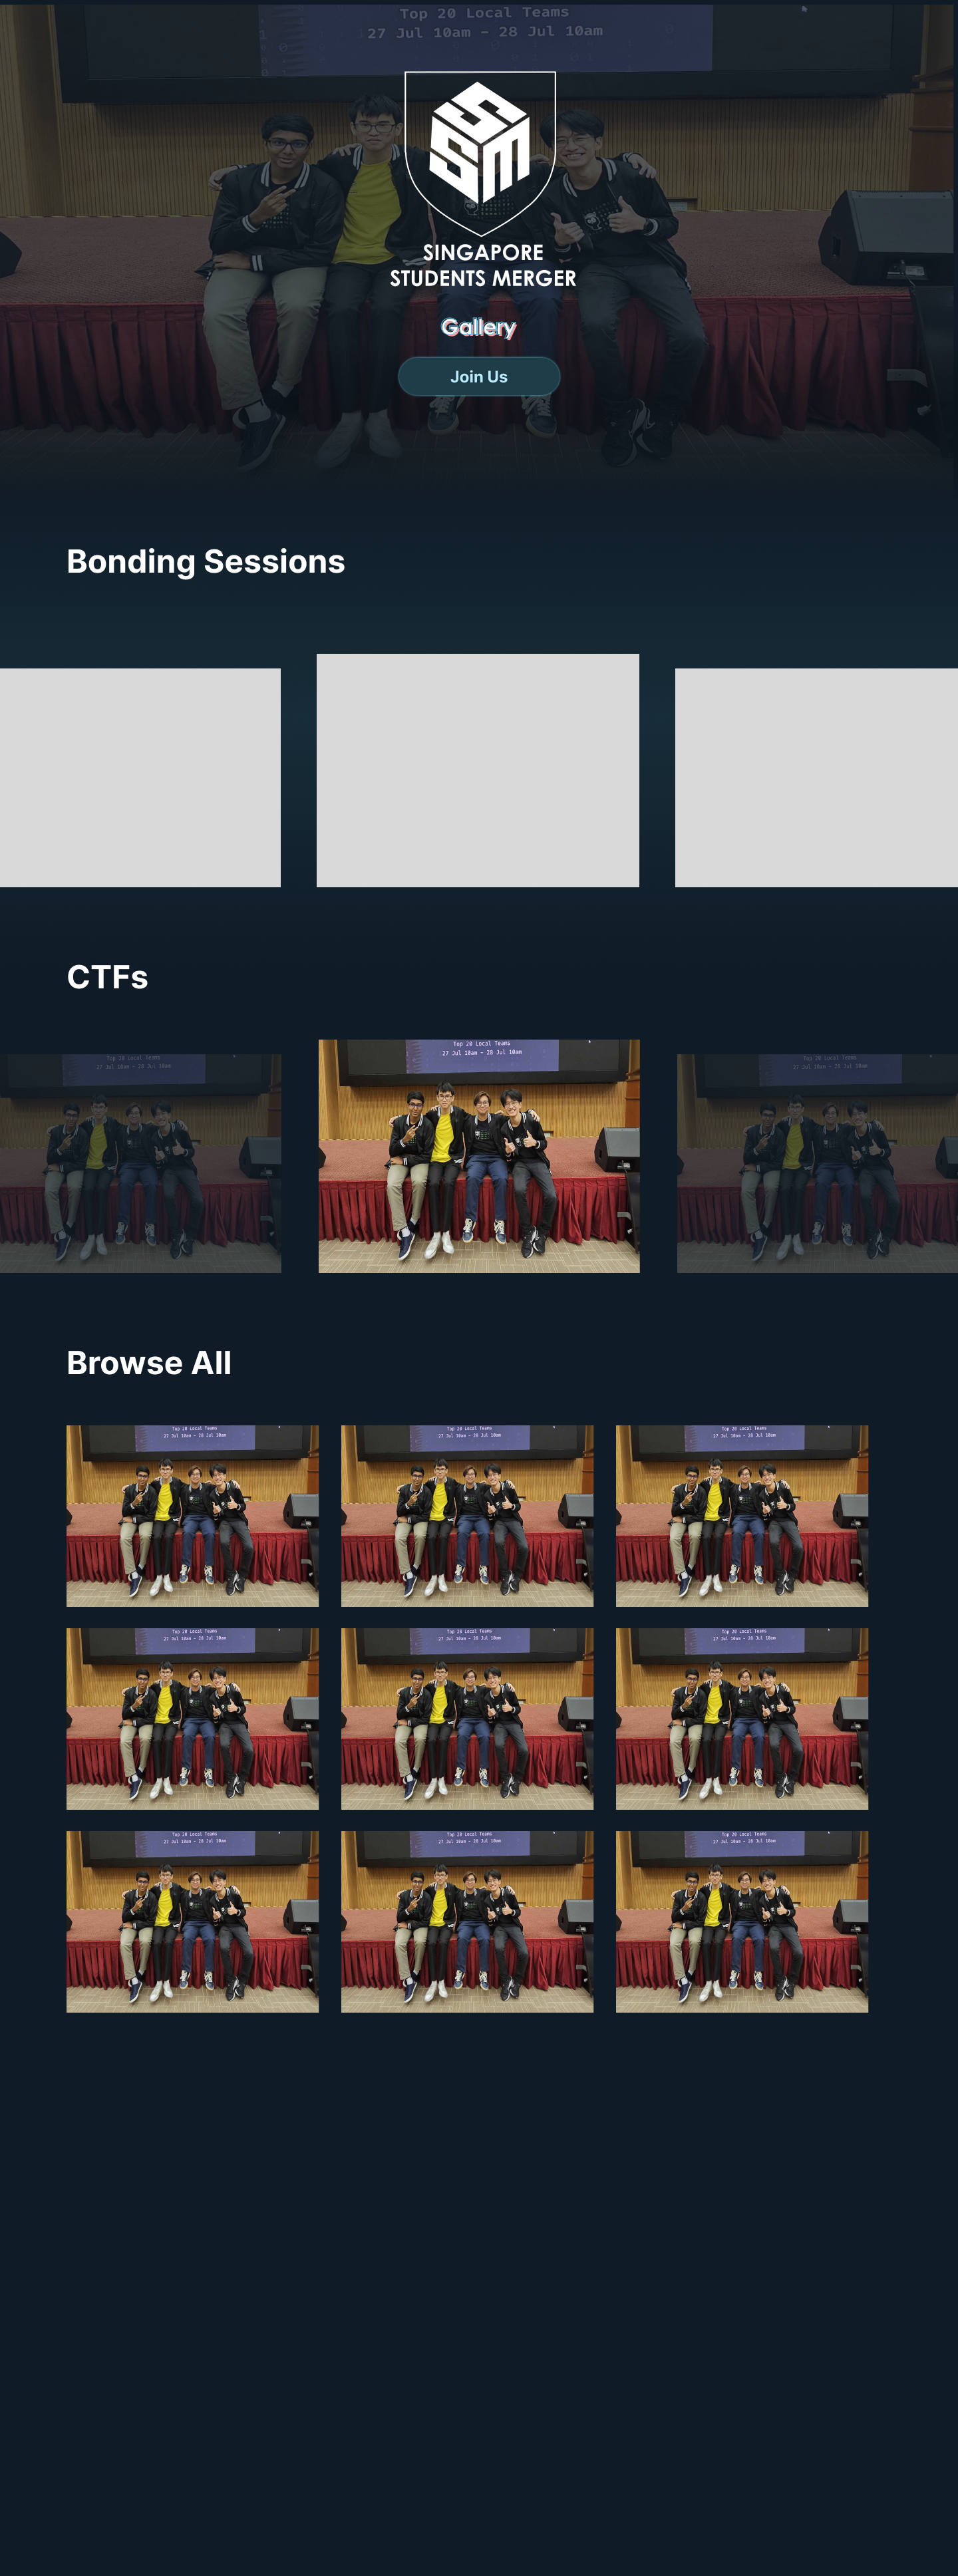
This is the gallery page. It showcases the images of our team during various events. Theres a carousel elements which I copied over from my personal website since I created it before. It fetches the image as well as the associated information, such as the event and the date, from the database.
Blog Page
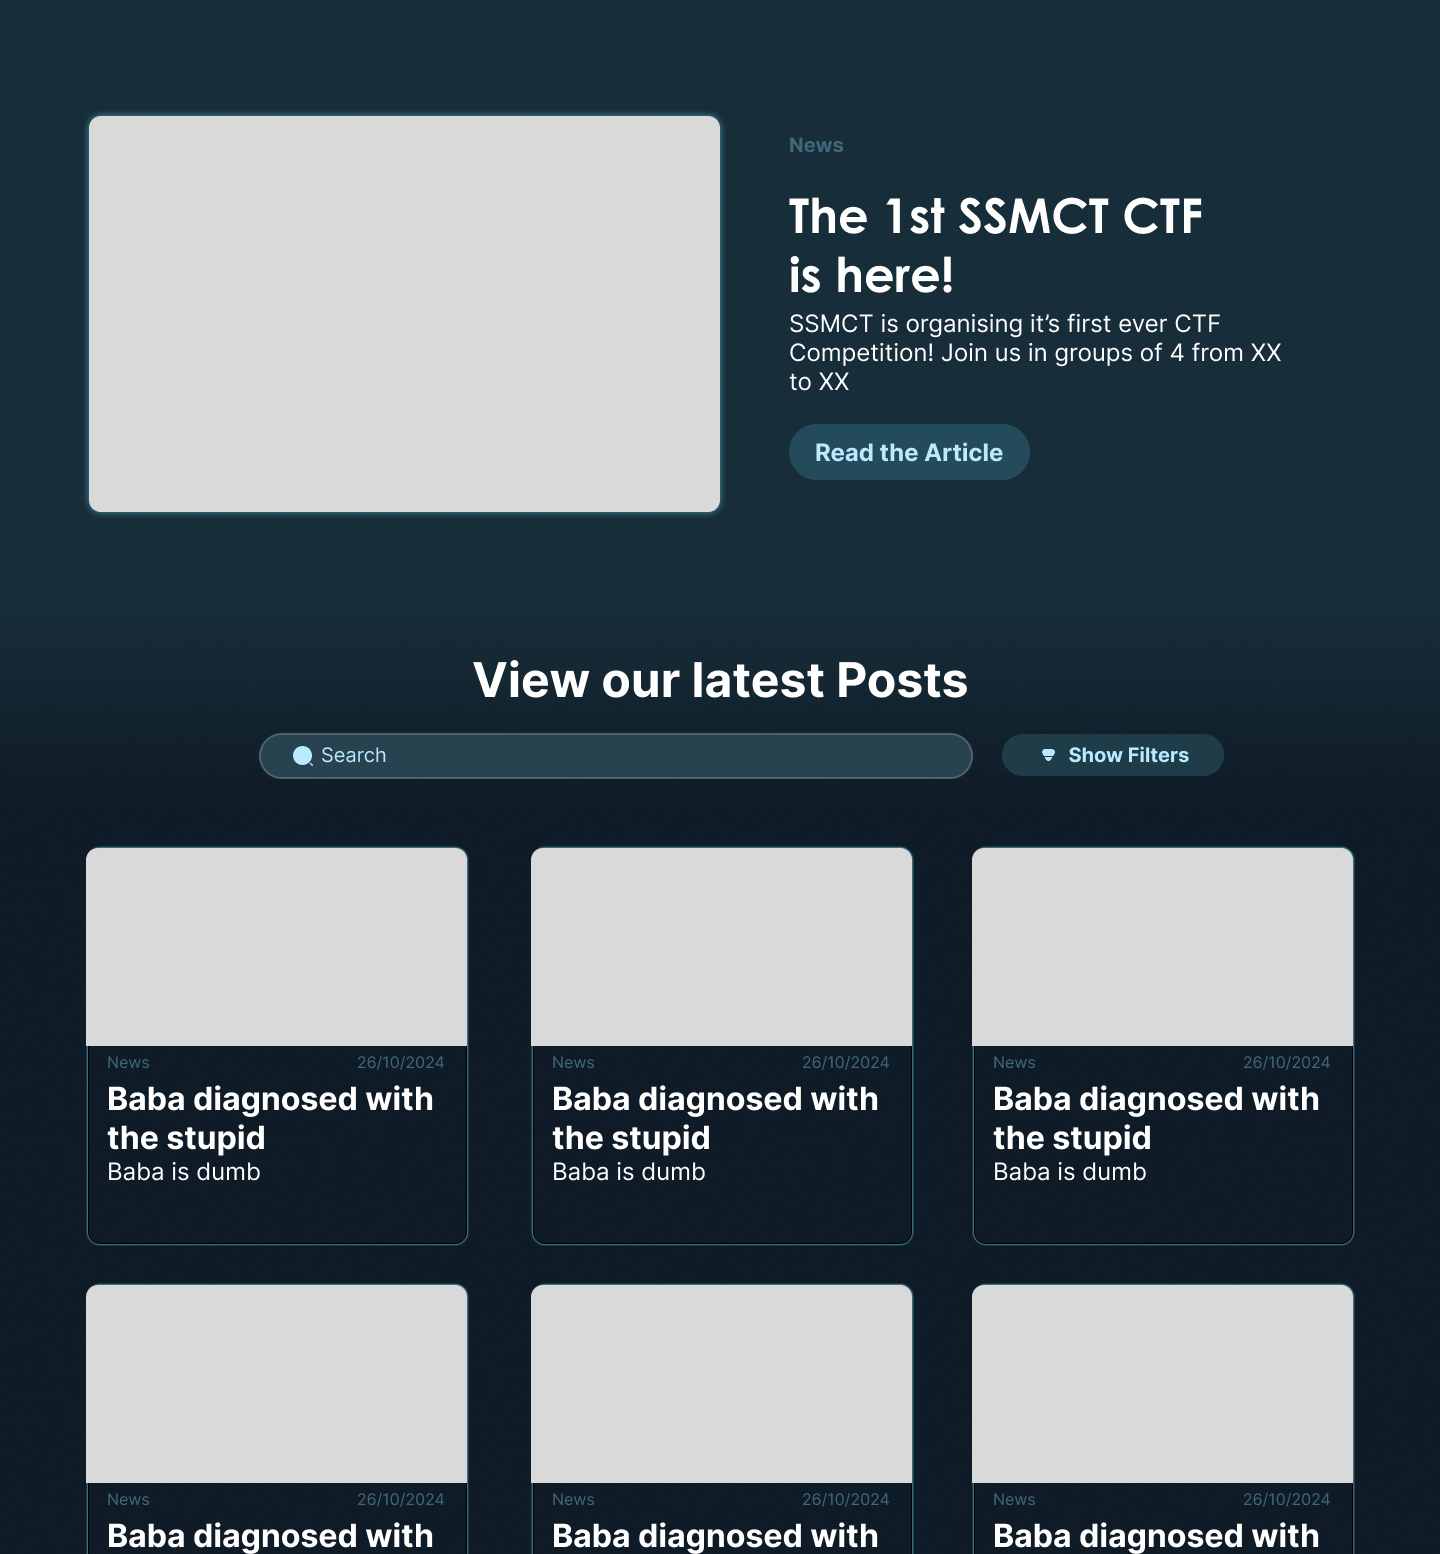
This is the blog page. It showcases all the blogs we have written. The blogs are stored in the database, and the website fetches the data from the database to display it.
The database also has a column to indicate wheter a blog is to be featured or not. If it is, it will be displayed at the top of the page. The blogs (as well as the writeups) have a filtering and sorting system, as we anticipated that we would have a lot of blogs in the future.
Writeups Page
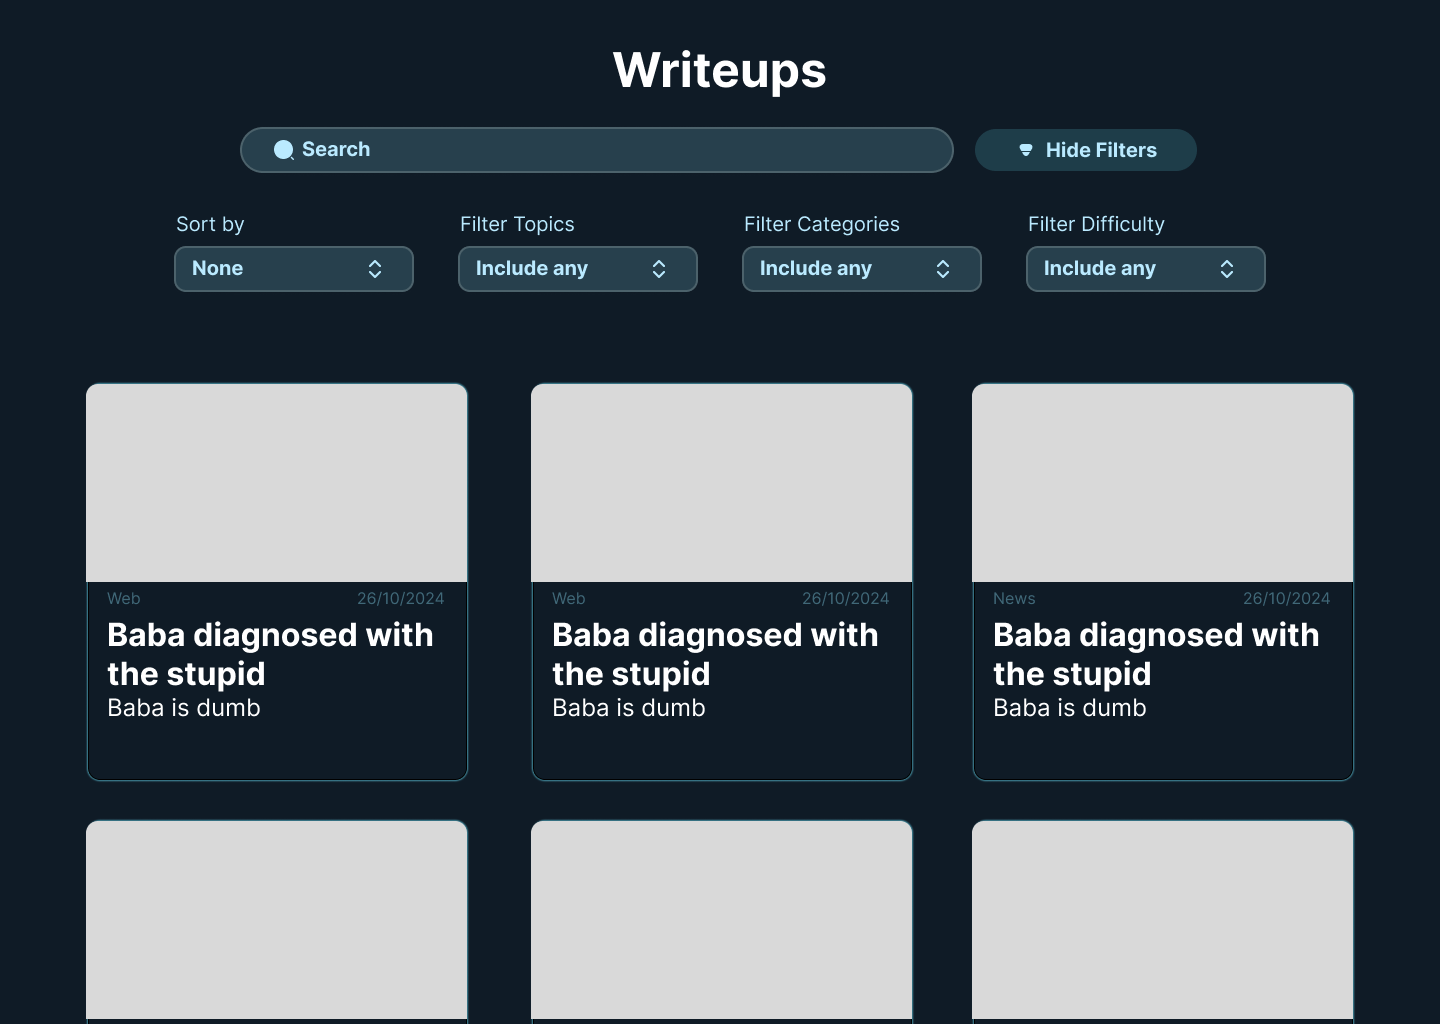
This is the writeups page. It showcases all the writeups any of our members have written. The writeups are stored in the database, and the website fetches the data from the database to display it.
This works similar to the blog page, with the filtering and sorting system. However, it does not have a featured section.
View Page
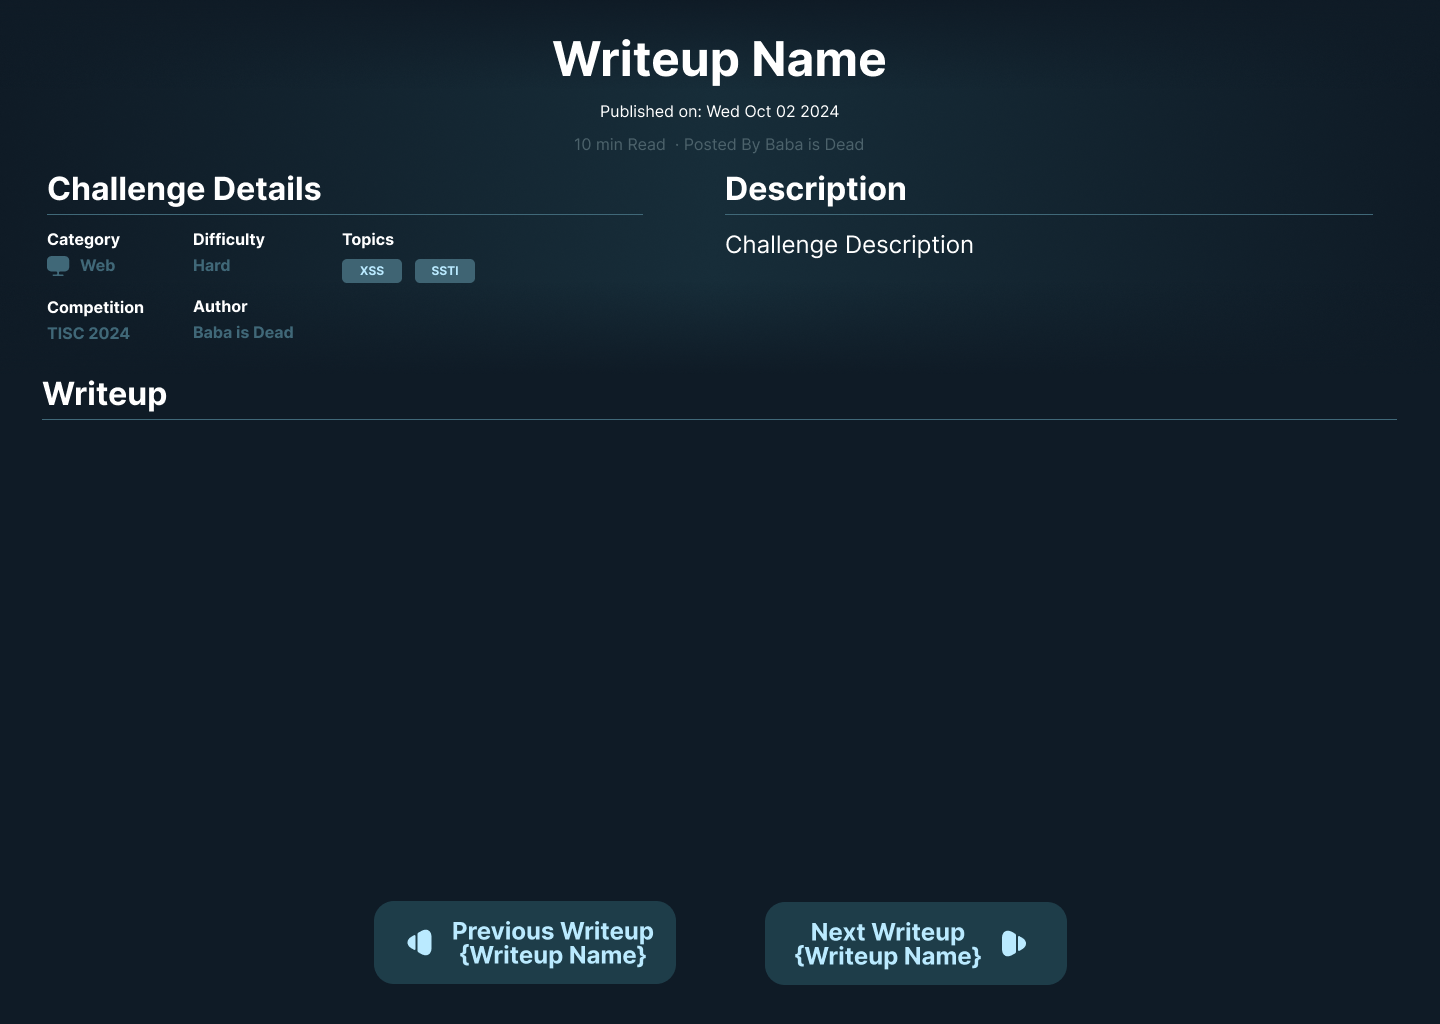
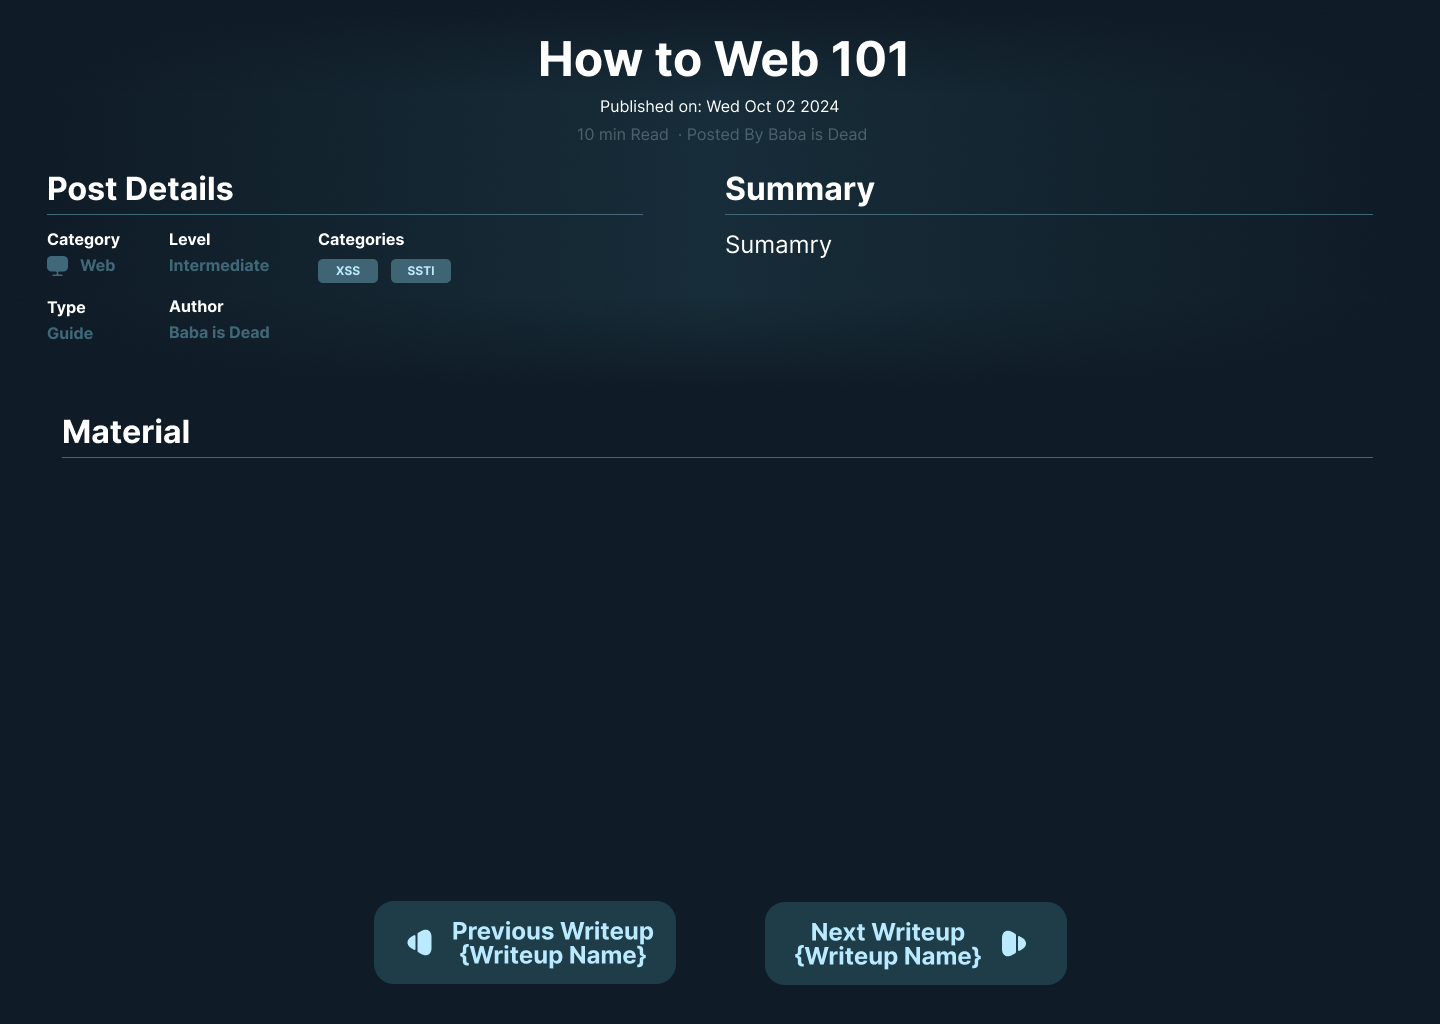
This is the view page for a individual writeup or blog. It displays the key information about the writeup or blog, followed by the content. The content is stored in markdown, and is converted to html using Remark and Rehype.
These pages also have a comment section, which is stored in the database. I wanted to add a like system as well, but I feared potential abuse of the system, so it will be an idea for the future.
Create Page
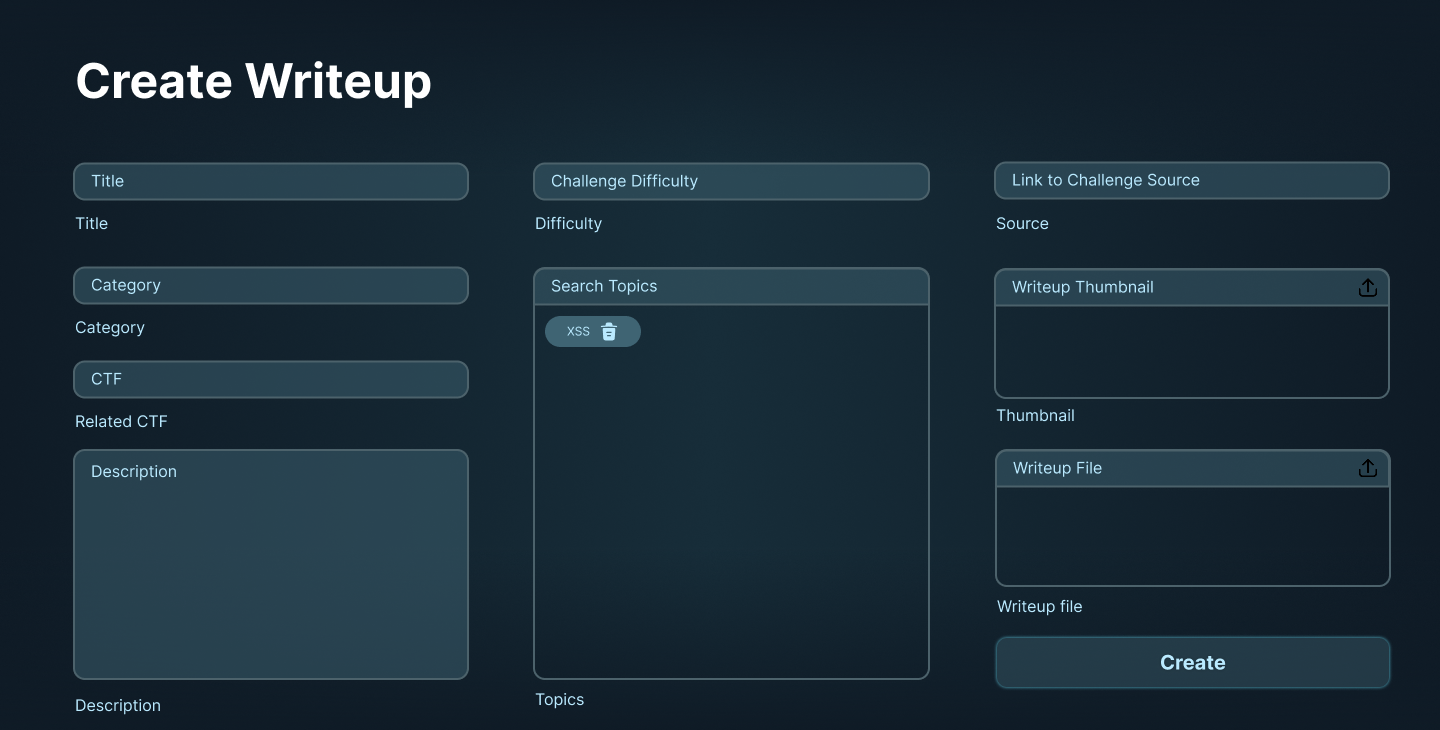
This is the page which allows members to upload their own writeups and blogs onto the website. Members fill in details about their writeup/blog, and upload the markdown file. They also upload any images they want to include in the writeup/blog.
In addition, the page also has an indicator to show what images have been uploaded, and what images have not been uploaded. This is to prevent members from uploading the same image multiple times, and to make sure they have uploaded all the images they need.
Login Page

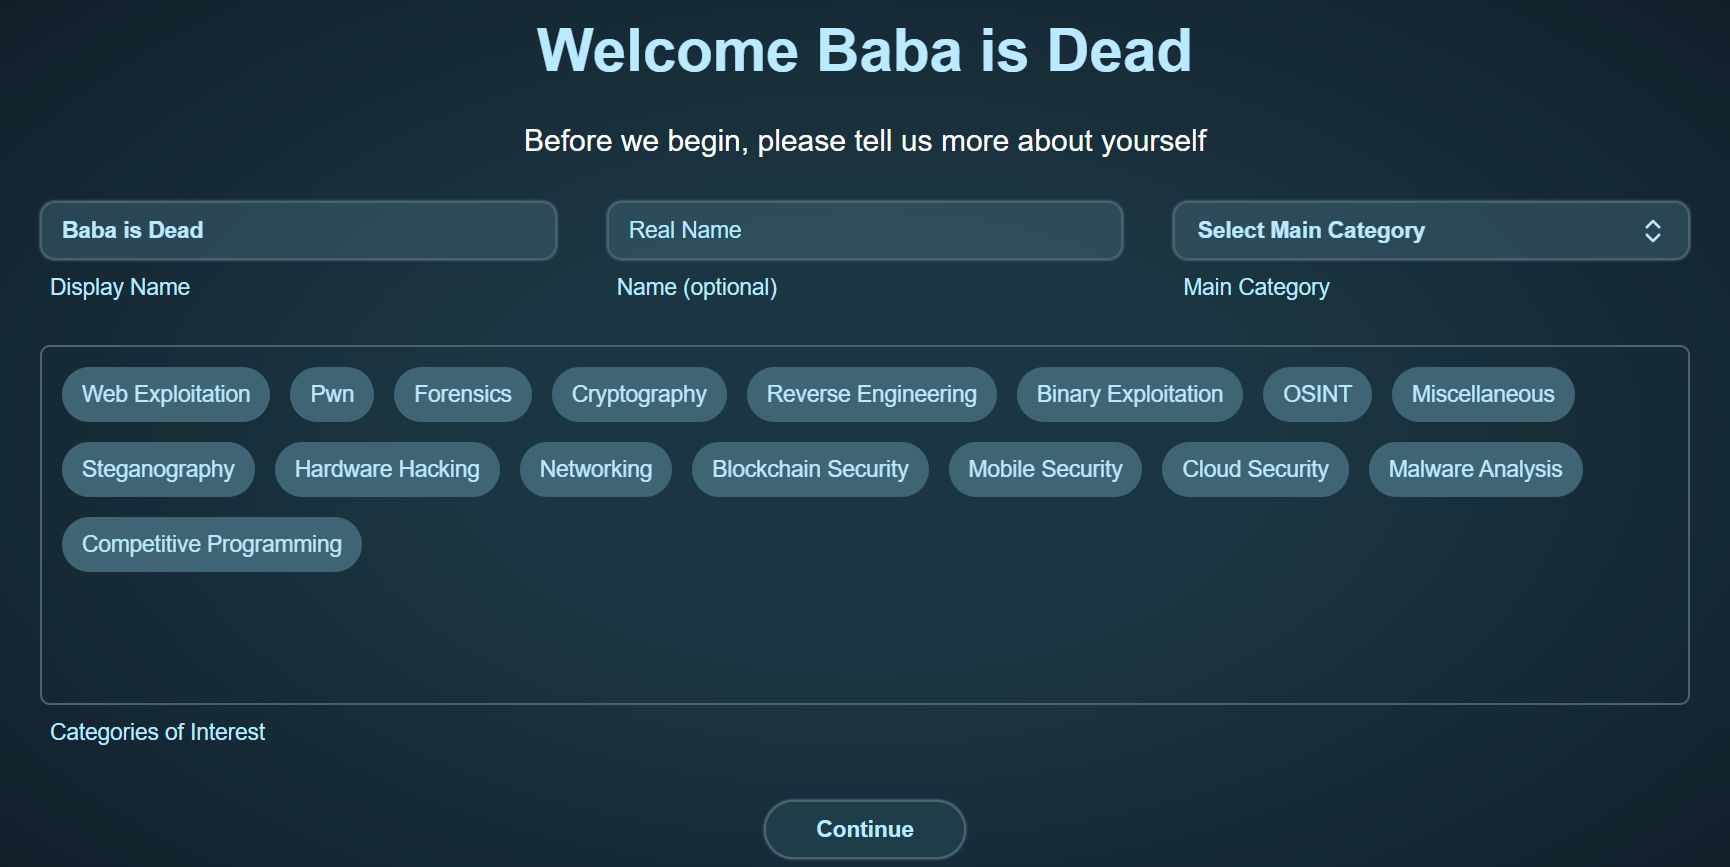
This is the login page. Members can only use discord to login, as we wanted to make sure that only members of our team could upload writeups and blogs. We verify that the member is part of our discord server by checking the guilds(servers) they are in and finding one with our guild ID.
If the user is a new user, they are redirected to the new user page, where they can fill in their details.
Future Plans
We will continue improving and adding new features our members want. One of the planned features was a live preview editor for members to easily create and upload their writeups and blogs.
Another planned feature was a like system for the writeups and blogs. This would allow members to show their appreciation for a writeup or blog without having to comment.
Currently, only members can give comments on writeups and blogs. We plan to open this up to the public in the future, as we want to promote healthy discussions about writeups and topics. However we will need to implement a system to prevent spam and abuse, so this is currently on hold.
Conclusion
This website was a great learning experience for all of us. We learned how to work with a team, how to use new technologies, and how to deploy a website. We also learned how to design a website, and how to create a website from scratch. Personally, I had a fun time working on this project (~~and crying over questionable code~~) and I hope more people will be able to see our website and appreciate the work we put into it.
Github Repository
The github repository for this website can be found here
Acknowledgements
Thanks to the web dev team for their hard work on this project. I couldn't have done it without you guys. Thanks to the Admins as well for their support and guidance. And thanks to the readers for reading this blog. I hope you enjoyed it.
Please login to comment
Comments
No comments yet